Introduction

Thank you for your interest in Interactor!
Interactor is designed to cover all aspects of any kind of interaction, from the designing stage in the editor to handling complex interactions in runtime. It contains editor tools to simplify the process of preparing a fully interactable environment and boosts creativity in terms of interaction freedom. And in runtime, it handles which player parts are going to interact with which parts of the interacted object, while using its own IK (or Final IK) to animate player bones.
If you have any questions beyond the scope of this document, please do not hesitate to contact me.
Installation
Interactor installation is easy. Just import into your project (import Final IK first if you wish to use integration with that).
Interactor needs a “Player” layer for raycast operations (For spawning new targets in editor and for selecting distant interaction objects in runtime). Create a new one if you don’t have Player layer and assign your player to that layer (Top right corner of Unity).
Or you can use your own player layer if you already have one. Don't forget to change layer name with yours on Interactor component / Layer settings.
Done!
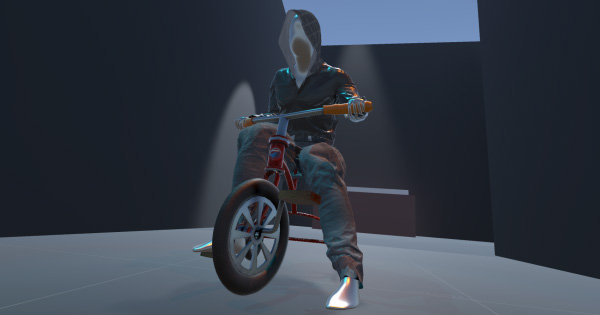
Now you can add Interactor to your characters (Preferably on the root of player gameobject where your controls are).
How Does It Work
After Interactor is added to the character, you need Effectors for each interactable player part. Effectors have their rules (angles, ranges etc) that determine if their interaction objects in the Sphere trigger are in a good position to interact. Also, they're the interaction handlers for that specific body part. For instance, a left hand effector will look at all left hand targets in the area, check their positions for the rules you set, and manage the interaction process until the end.
You can add as many effectors as you need to your character but Interactor natively supports for hands, feet and the body. Effectors need to be positioned as they are the source of that specific interactable part so you can properly adjust their range and angles. The best place for hands is around the shoulders. Because hand effectors will animate the upper arm and lower arm to move your hand to interaction object. So the distance and angles need to be set for that shoulder point.
It's quite easy to set positions for effectors and you can place them exactly where you want them to be, with custom-made gizmos. And there is also an Auto button which makes the process even more straightforward. When you press it, it will calculate all the rules for that effector type. Then you can make adjustments if you wish.
One Trigger to Rule Them All
When an interaction object enters Interactor’s trigger (player’s interaction trigger from now on), effectors start to check that object’s targets which are children of it. Target has another component (InteractorTarget) for interaction and it has effector type property and some override settings for range & angles. Effectors check those types to get a match and then check their positions to see if the interaction is possible.
If the interaction is possible, the effector goes into a possible state and activates that interaction object. From that moment it is possible to interact with object automatically or with player input (depending on interaction type) until the object’s target position stays in range & angles. On the animation side, it’s InteractorIK’s turn. Interactor sends an interaction start call for that specific player part and its target.
Interactor Workflow
Interactor has four main components:
Itself which operates its effectors and their interactions,
InteractorObject which handles the interaction object and caches its values & targets for to be used in Interactor,
InteractorTarget determines how your characters will move their body parts to InteractorObject and which part of the object they interact with,
InteractorTargetSpawner which plays a big role in the designing stage as target prefab holder and spawning them in the scene.
First, you need to prepare some targets to work with. These are regular player parts with specifically rotated to fit desired interactions. For example a grabbing hand, finger pointing, etc. It’s really easy to prepare them and it’s just a one-time setup.
Select your body part and duplicate it in the scene. Unparent it and add an InteractorTarget component on it. Select the effector type and other settings. Set its position to zero (or any offset you want) and adjust its bone rotations as you wish. Drag it to the project folder to make it prefab and done, you have your first prefab. Make a list of selection for each effector type & body parts. Assign them on InteractorTargetSpawner to add them on SceneView right click menu. Now they can be spawned anywhere and anytime on any object you want. Or the whole target creation process can be automated with simple one click. Select the effector on Interactor and click Create Target. It will prepare the target for you and now you can create prefab and assign it on InteractorTargetSpawner to spawn and use.
InteractorTargetSpawner window needs to stay opened for activating the SceneView features (It can stay as deactivate tab on any place in the editor). Besides of right click menu, Effector/Spawn Settings window on SceneView also needs InteractorTargetSpawner window to be opened. Once you created effectors on the Interactor component, you can edit their spawn lists at there. Effector/Spawner Settings window can be used in fullscreen SceneView for maximum effectiveness (Shift + Space for default keyboard shortcut while the cursor on SceneView).
When you right click in the SceneView, you'll see the targets you added on InteractorTargetSpawner. If you select any of them, it will be spawned on the clicked gameobject with the rotations & position offset you adjusted before. But this gameobject also needs InteractorObject component so add it and adjust all the settings as you desire. Now you should be able to interact with it in Play Mode. Now you can delete its child objects including targets you spawned, drag it into project window to create another prefab. Assign it into Spawn Presets section of the InteractorTargetSpawner. From now on, you can spawn your targets with Add Components option selected. It's name will show up as preset and same settings will be copied to clicked object.
This is the basic workflow of the Interactor. You can find more information for each component at Interactor Components section and some more tips at the Tips section. Also, don’t forget to watch tutorial videos, it’s a lot easier to follow steps while watching.
Flow Diagram
This is how Interactor and its components communicate. It is a bit old but the workflow is still the same. It will be finalized with the v1.0.
Click on here to see the fullscreen version. You can start following the flow from top left corner of the image.
User Interface
This section explains the UI workflow, not the settings one by one. For that, you can read the Interactor Components for each one of them.
Interactor has the most detailed editor script in all of the components that come with the package (Followed by InteractorTarget with its path features). It handles SceneView custom gizmos as well as the tab selection and drawing a good looking UI. It almost works as fast as regular Unity Inspector components (On Unity 2020 regular Inspector component takes 0.15-0.20ms to complete it’s editor loop, while the main Interactor UI is taking 0.25ms average). And all windows have zero effect when the mouse cursor is not on them. But still, Interactor designed to work without the need of its main component to be selected. You don’t even need to see Interactor UI to work with. You can use its SceneView windows or handles to edit. Interactor is needed just for adding new effectors and some one-time setups (Assigning Self Interaction object, LookAtTarget and Layer settings etc). And also if you’re not working with a really really tight performance budget while profiling on Editor (It doesn’t even make sense), you don’t need to worry about anything.
Interactor, InteractorTargetSpawner and SceneView Effector/Spawn Settings UIs are working in sync. If you make any changes, other UIs will show results at the same time. Also, almost every change can be undone with Alt + Z or Undo selection on editor.
Interactor
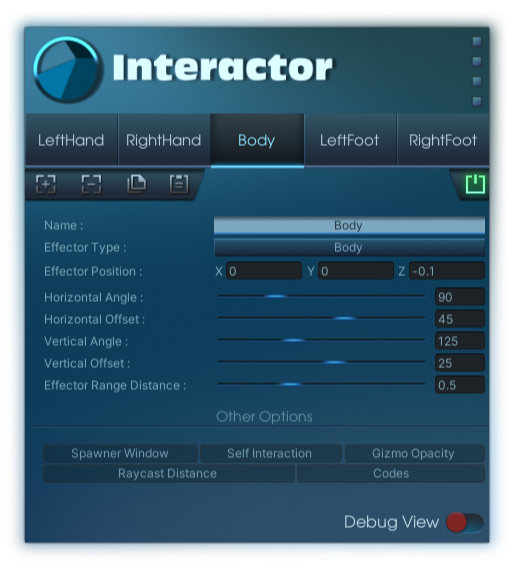
For information about settings, see Interactor component section.
Interactor Target Spawner
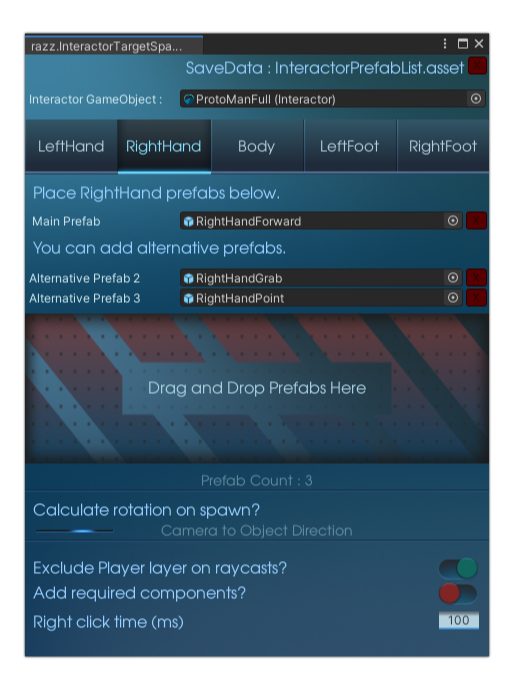
For information about settings, see InteractorTargetSpawner Window section.
Interactor SceneView Menu
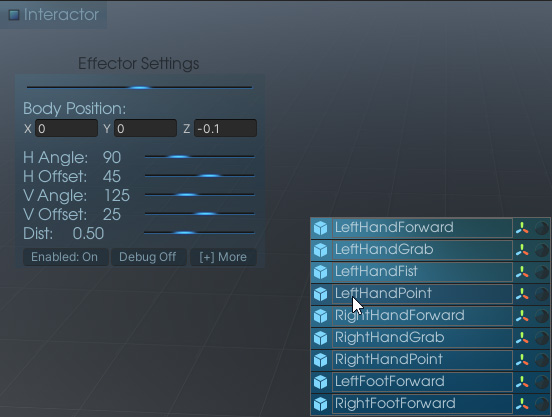
For information about settings, see InteractorTargetSpawner Window section. SceneView right click menu and Effector/Spawn Settings windows are the parts of InteractorTargetSpawner.
Example Scenes
You will find examples for every interaction type in example scenes. There will be more examples in those scenes when new interaction types added.
It’s a good playground the see how everything works. Some interactions can interrupt each other and that can cause some glitches (trying to climb ladders while using the bike etc) but it’s not a polished game in the end. But mostly I set controls/conditions for such glitches and it will be better with time since I’m also using Interactor in my game.
Models & Textures
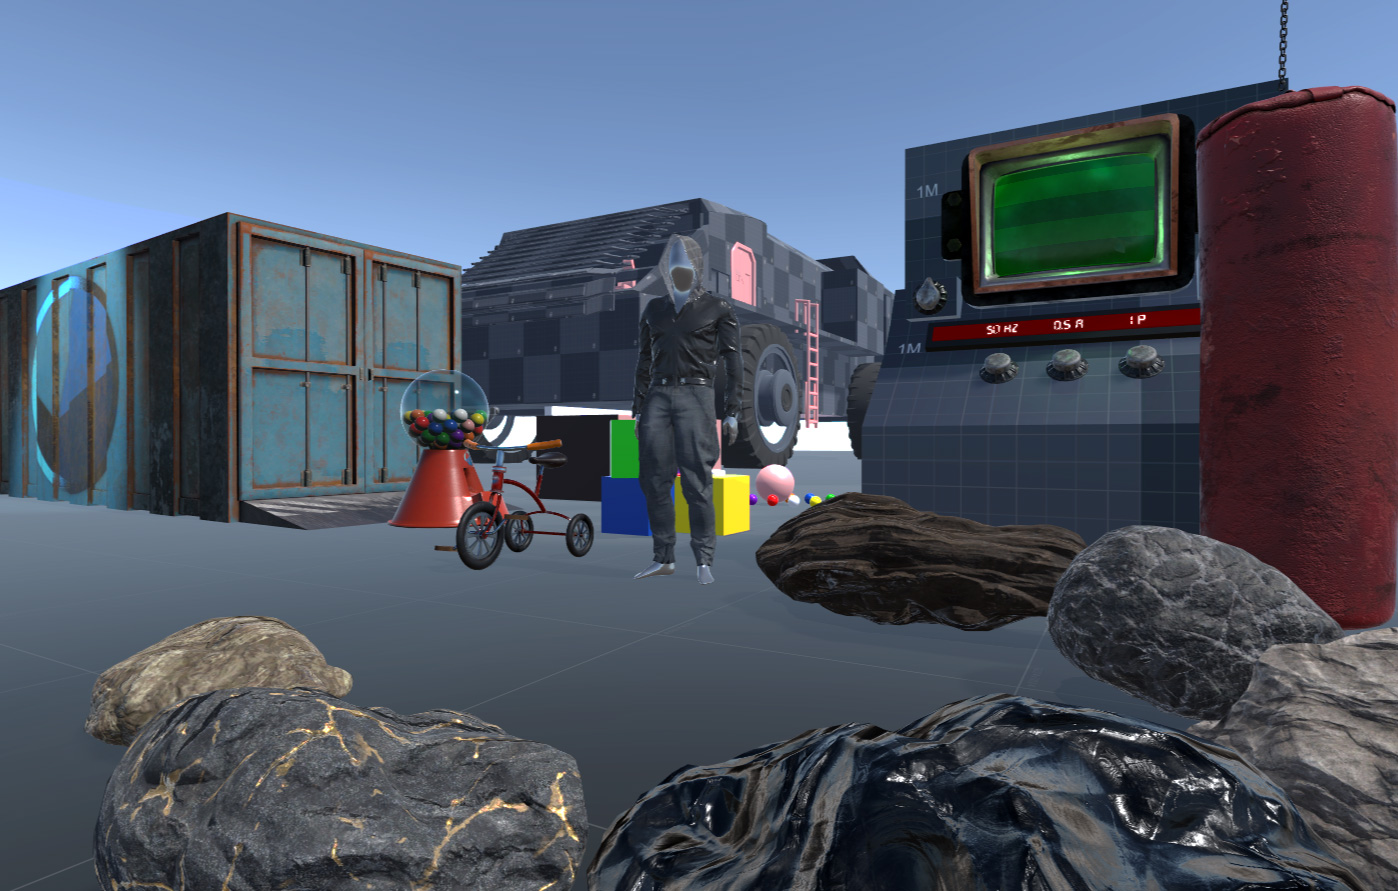
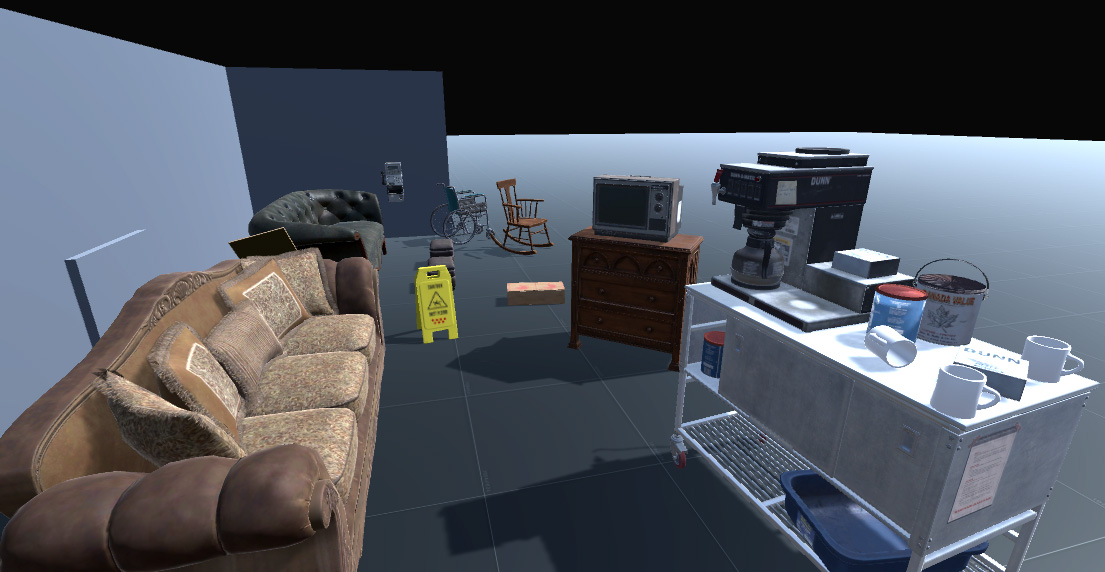
Half of the 3D models are modeled & painted by me. While adding new interactions, I will also add new models to play in new ways. All of the textures are PBR and available in 4K but Interactor comes with 1K textures to keep the size as small as possible (so updates would be easier). You can download the 4K texture pack from here. Once you imported the package, all textures will change with 4K versions, no extra procedure needed, just import and done.
Shaders
I included some bonus shaders. Outlines Shader is directly used in examples because it controls the interacted object’s material but others are mostly cosmetic. Shaders are written just for Built-in Render Pipeline so probably they won’t work in HDRP or URP. But they are not necessary for Interactor, as I said they’re just bonuses. Besides the shaders, Interactor will just work the same as Built-in RP for Scriptable Render Pipelines (HDRP and URP). You will find these shaders under the Interactor menu in shader selection for materials.

Cloth Shader
Cloth shader has a transmissive feature and lets light pass through. So the object shadows can be seen from both sides of the cloth. It has Albedo and Normal map slots and Specular & Gloss sliders to adjust the material. The transmittance amount can be adjusted and there is a rim effect that glows the whole object with the selected color.
Fake Volumetric Light Shader
FakeVolumetricLights used in the ProtoTruck example scene and they create a basic fake volumetric light effect for turret lights. They used on a cone object to look like a light beam. You can play with settings to get the desired look that suits your projects.
Hologram Shader
Hologram shader is used for creating an old terminal screen effect. It has properties for setting the old tv scanlines, glitches, flickering and more. It can be used for any kind of project.
Standart Metallic Outlines Shader
Outlines shader is the main material for interaction objects in examples. When objects get activated their properties adjust its glow to notify the user. It has two different glowing options and they can be set with different colors as well as with different widths. I scripted it to look exactly the same with Unity Standart Metallic shader so when not glowing, it will just look exactly the same with Standart materials.
3D Text Shader
3DText shader and SceneText shaders are used for some text objects in scenes. 3DText is for the console’s display frame to show values.
Integrations
Currently, there are two versions of Interactor. When you import, it comes with DefaultPack (which uses Unity IK) and you can convert between DefaultPack and FinalIKPack (Final IK integration) on the Interactor component at any time with just a button click. To do so, add the Interactor component on any hierarchy gameobject and you’ll see the integrations section on newly added Interactor. If you already have Interactor with effectors added, just reset it to see its front page (Integrations section only appear on the front page without any effectors added).
All of the interactions work mostly the same between InteractorIK and Final IK. But since Final IK is a whole different package with more capabilities, it’s a better solution for interactions. For example, Final IK can pull or push the whole body hierarchy to adjust itself. But Unity IK is a Two Bone IK system. It can only affect hands & feet and their two parents (Forearms & arms or upper legs & legs).
But both IK solutions mostly do their jobs and work pretty the same. Maybe in future updates, I would replace Unity IK with a Full Body IK solution. But Unity IK works just fine in most cases and in the cases where it needs to go out of boundaries, you can use it with animation support (For example, a basic crouching animation would help the IK to reach to object when picking up). To get the idea, you can watch the Workflow Trailer which recorded %100 with Unity IK.
Default Version & Final IK Version
What actually integration change buttons do?
Integration buttons unpack and imports necessary scripts from DefaultPack and FikPack Unity packages.
Those files get replaced by their respective package.
All versions of Final IK is supported and all the Interactor components and workflows are the same between those versions.
Unity Animation Rigging
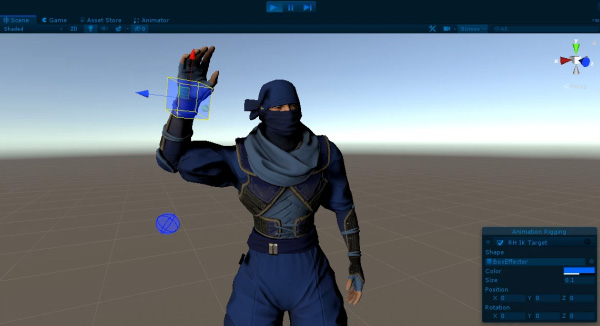
Unity Animation Rigging package is also another IK solution for users. It has been in development for some time and is still in development. It’s a great companion for Interactor. It has tools to animate bones and Interactor has tools to tell which bones are needed for what kind of interactions. They complement each other, Animation Rigging package is a great replacement for InteractorIK. But since it’s still in development and requires Burst packages, it will be better to wait a bit longer.
Game Creator
Interactor works quite well with Game Creator. All workflow is the same except you need to pay attention to two things.
After you made a proper setup with Interactor for your character, go to Character Animator component of Game Creator and disable Inverse Kinematics options. You can disable all of them or the only ones you'll use with Interactor. For example, you can just disable hands and head IK options if you wish to use Interactor just for hands and for looking at objects.

And second, Game Creator puts the Animator component on an unusual place. But normally Animator need to be at the same place with InteractorIK to get OnAnimatorIK calls on time. To fix that, put AnimatorCallback.cs component on the same object with your Animator, and assign InteractorIK to its slot. That's it; you're all set!
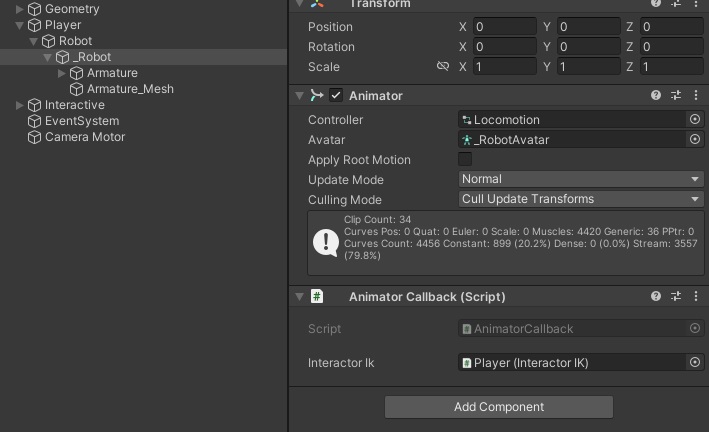
Also don't forget Game Creator examples use Unity's Character Controller and have no Rigidbody on them. If you want to detect interactions around your player, you need to have a Rigidbody on your character or on your objects as Unity's rule. You can put a Rigidbody on interaction objects to detect them (You can also set Rigidbody Kinematic if you don't want them to be affected by gravity).
For other integrations with popular assets, please refer to the integrations tutorial.
Future
Orbital Reach 2.0
This will offer more fluid animations, increased ranges and heights, while maintaining the ability to perform interactions in omni directions. It will fully support walking and running without interrupting player's animations or its speed. Additionally, it will include supporting animations like arm swinging to enhance realism or cancellation animation when an interaction fails. This will provide a system similar to the interaction mechanics in The Last of Us Part 2 while walking and running.
HDRP & URP
HDRP and URP work just fine but they need respective material setups for their scenes. Also custom bonus shaders don't work in these pipelines (Outline etc).
Mobile Example
Interactor works quite fast on even old mobile devices. Example scene will be added so you can try yourself.
Known Issues
Two Hand Pickups
You may have issues with two handed pick ups. There will be a complete overhaul for most of the interaction types with v1.0.
InterruptTransfer
The interruption system allows switching interactions in mid-way so bones can smoothly redirect themselves from one path to another. There are a few bugs with weight calculation when switching interaction on TargetPath and BackPath. So you may have minor issues when interrupting one interaction for another one (Like instantly moving into a new path instead of smoothly lerping between them).
LookAtTarget
LookAtTarget timings (OnPause, Before etc.) need rework but it is postponed for the Stackable Custom Interactions update (v1.0). Also, all instant target switching issues are known and will be fixed (Instantly turning the head).
Troubleshoot
Most of errors/issues give you warnings on your Console window when something is wrong. Always check your logs, and click on them to see which object they're related to.
I don't see any interactions on upper left corner or Use text on the game screen when interactions are nearby.
Be sure you have BasicUI.cs on a gameobject.
If your character doesn't have a Rigidbody on it (Unity's Character Controller, for example), you can't detect InteractorObjects without a Rigidbody on them. So at least the player gameobject or the interaction gameobject needs to have a Rigidbody to detect each other with OnTriggerEnter as Unity's rule. Check that again with an object with Rigidbody (Pick up interactions etc). That is a default rule explained at Collision action matrix on Unity Documentation.
As I mentioned before, you need to add rigidbody to your player or the object. Or you can manually add interactions to your Interactor by calling interactor.AddInteractionManual (yourInteractorObject). For removing the objects from Interactor, interactor.RemoveInteractionManual (yourInteractorObject). You can also do that with Unity Events without any coding. There are examples in example scenes (First Person ExampleScene).
I can interact with objects but hands/feet are only rotating without changing their position.
Check your AnimatorController on your player Animator. When Animator Controller is opened, you'll see the Layers section on the left side. At least one of your layers has to have IK Pass enabled (IK logo will appear near them). It is on by default, but for some characters, it can be turned off. Click the tiny gear icon and check/enable it.
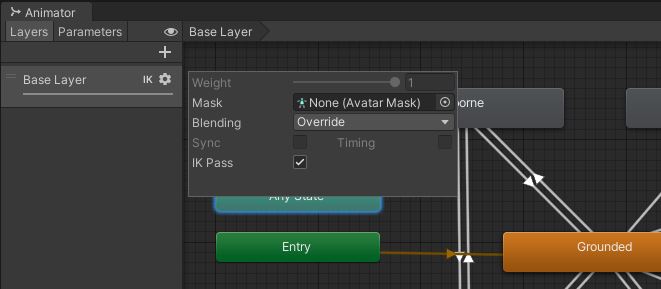
Make sure not any other tools/plugins uses IK at the same time. If any other script is using the player IK, it would cause a conflict with Interactor.
If Animator is not on the same root gameobject with InteractorIK (which is unusual), put AnimatorCallback.cs component on the same object with your Animator, and assign InteractorIK to its slot.
Error: Hand or Foot bone count doesnt match with effector bone.26 21
Your current InteractorTarget that you're trying to interact with has a different child bone count. It means it doesn't belong to your character and you need to create your own InteractorTargets. See the tutorial at Videos section for creating targets.
InteractorObject disappears.
InteractorObject has unselected Interaction Type or missing settings file so it turns itself off to avoid NULL errors. Check the Console messages, click on the error messages and check selected object's settings.
Support
You can reach me with several options. All of them will be responded as soon as possible (mostly on the same day).
You can follow the official forum thread on Unity Forum and reply a post so others can read too.
And you can send an email to me.
